Vivid Skin – Graduate Project conclusion

Although the deadline for my graduate project has come to an end, it is not the end of Vivid Skin. As mentioned all along, Vivid Skin is a project that can be continually added to and adapted to improve and widen the scope.

The initial designs for this project and the final outcome do not differ too much. I wanted to create an immersive music visualisation experience and that is what I have achieved. When I first imagined making the project, I thought that getting short-throw projectors and making a solid cylinder would be a lot easier than it was, meaning I had to make changes along the way – firstly by making the cylinder out of fabric, and projecting from the outside rather than inside. If I were to have a much higher budget, then I would have used ultra-short throw projectors, and made a solid, free-standing cylinder. Through having to adapt, it made me learn a lot more about both fabrics, projectors and computers.

One of the main ideas that I did not fulfil was the challenge of making the music binaural. I initially wanted to do this so it would be more immersive for the audience, however after starting the creation of the visuals I realised that this would not be as effective as I first thought. I would have liked to have been able to make the audio binaural, and for the visuals to react to this, but this would have been a lot more complicated and needed the use of an engine such as Unity to create. I used After Effects and this type of complexity cannot be achieved in this software, therefore it would not have been effective to make the audio binaural because the visuals would not have been reactive to movement.

I have taught myself the skills I have needed in both After Effects and projection hardware and software over the course of this project, and I have also learnt a lot more about computers due to the limitations and issues that I have come across throughout the journey. I now know much more about PC’s and the capabilities they have when it comes to multi-display outputs, and I also know a lot more about cabling and the hardware needed for running multiple projectors.

If I were to start the project again now and make any changes, it would be to make sure I had a room to myself that I did not need to take down my equipment each time, which would therefore give me more time for rehearsing and creation of visuals.

I am very happy with how the project has turned out, although there is still room for improvement before the exhibition. Within the exhibition space, I will make the room darker so the visuals appear clearer, and I will also have much more space around the cylinder than I have had in the Colab room, so I will be able to spread my projectors out more evenly around the space so I can get it looking completely seamless.

I will be blogging the next stage of the project as well which is the creation of my trailer, poster and business cards. I look forward to displaying my work at the exhibition and I also look forward to hearing feedback and reactions from visitors.


Final Visuals

Here are the 5 final visuals that I have made for my graduate project – Vivid Skin. These visuals will be projected around the cylinder to create a seamless, 360 performance for audience members to engage with from inside the cylinder.

Visual 1 – The Falling Tree

The Falling Tree is a song by King Tolla  (https://soundcloud.com/kingtolla) – an artists who is friends with my housemate. He has given me permission to use his music within my project. This visual was made using Trapcode Particular to simulate some of the patterns and colours that occur within reflection and refraction of light. A random wiggle expression has been applied to the emitter, and the glow on the particles is audio reactive. When layers of particles overlap, the glow becomes brighter.

Visual 2 – Pianomoment

Pianomoment is a song from Bensound, an online artist that creates royalty free music. I chose this song based on the feedback from my dissertation exhibition whereby one audience member said they would like to see the work I did (FLUIDITY) with classical music. I recreated this very similarly to the visual that I made for my dissertation, adding in another emitter to make to opposing visuals – I also added plenty of colour into the composition to make sure it can be seen clearly when projected, and I also like the effect of when the colours of the particles blend into one another. Initial inspiration for FLUIDITY was taken from this video.

Visual 3 – Whats It Gonna Be

Whats It Gonna Be is a song produced by DE$iGNATED – the are a duo that I went to school with who have given me permission to use their music within my project. I made this visual to be a reactive particle field because I feel that each individual particle looks like a light, which is reflected in the work of Lorna McNeill when she uses fibre optics. The lines of lights bend and disperse in the same way that fibre optic cables do. I then made full use of the camera function to make the composition more dynamic to lead the audience’s eyes around the cylinder.

Visual 4 – Lost Metropolis

Lost Metropolis is a song by the Artist Muzzy. Muzzy is a friend of mine from school who kindly said I could use have permission to use his music for my project. This visual makes use of 3 spheres that float around in space when the tempo of the music is slower, and then they become stationary and pulse/disperse when the beat of the song kicks in. I wanted to make a visual that looked more 3D so that when it is projected on the cylinder, it gives the effect that it could be beyond the surface.

Visual 5 – Cleopatra

Cleopatra is another song by DE$iGNATED – I made this visual after I did my filming because I wanted to use Trapcode Mir. I made the visual react to the music in a way that makes the lowpoly field seem like it is bouncing, as this replicates how the song makes me feel when listening to it. Much like Whats It Gonna Be, I made full us of colour and camera angles to make it dynamic and to lead the eyes of the audience around the cylinder.

Final Product

This video shows Vivid Skin in situ in the Colab room at the university. It shows the project working and the visuals being projected around the cylinder entirely, with the audio being played through the headphones (music has been edited over the top for the purpose of the videos).

Software

For the creation of my visuals I have been making the composition 5120×720 – 4x the width of a standard composition. Therefore, I needed to find a projection mapping software that will allow for multiple displays. After some research I found out that for PC there are a few options – VIOSO, TABULA FaçadeSignage, Resolume. I tried using VIOSO free trial but did not realise there would be a watermark across it, so I was not able to use this. When trying to use TABULA FaçadeSignage I could not figure out how to split the composition across multiple displays. Which left me with using Resolume. Resolume is made for the purpose of VJing and live DJ sets with visuals, so it is the perfect software for what I need. The image below shows Resolume in use with my project – it allows me to select the area that I want projected from each different output, meaning that I can create a seamless visual around the cylinder.

It also allows me to save this mapping set up that I have created, so for the next time I set up the project, I do not have to re-map it all again – I can simply re-open the saved file and set up the projectors again.

Artist Research – Karma Fields | The HEX

Throughout the journey, I have come across more and more work that inspires me and my project. When speaking to Muzzy (music producer) about using his music for my project, he mentioned the event ‘Karma Fields Live’ from Monstercat as he said it reminded him of my project. I had not heard of Karma Fields before he mentioned it, and after watching some videos I can see that some aspects can be linked with my project. Karma Fields Live makes use of a transparent Hexagon for displaying a 360° visual surrounding a DJ. From an initial look, Karma Fields and Vivid Skin could look very similar, however the ideas and concept behind the projects are very different – Karma Fields Live encapsulates the DJ within the environment; making them the centre of focus, whereas Vivid Skin is about immersing the audience inside the structure. Karma Fields Live also uses real-time rendering to produce the visuals that react to the live DJ set. As shown in the image below, the audience surrounds the Hexagon, so this shows that my idea is still original as the ideas surrounding both projects differ from where the focus is; either on the artists or the audience.

Visuals – the making of

To make my visuals, I have been using After Effects with the Trapcode plugin. The Trapcode plugin is very useful, because it includes Form and Particular which are both particle based systems, meaning a wide variety of visual effects can be created from building up the particles in different ways. It also has Mir and Tao which is based on building up more geometric shapes; a low amount of vertices will give a more abstract/low poly effect, or a high amount can give a more realistic effect, such as flowing water.
However, the most important part of the Trapcode plugin for me, is Sound Keys. Sound Keys analyses songs/audio meaning anything can be made audio-reactive. Firstly in Sound Keys, a track needs to be selected from the composition:

Once the track is selected, an audio waveform then appears, and using the spectrum adjustment tool, up to 3 different ranges of the audio can be selected for analysing. In the image below I am using two ranges so I can get two different beats in the song to react to the audio.

Sound Keys will then generate an output in keyframes for that range that has been selected, which can then be used to make any part of the visual audio reactive.

In this example, I have made the amplitude of my visuals link to Output 1, and the Offset Z react to Output 2. This was done by making an expression and using the Pick Whip to link with the output.

With this as a basis, anything can be made audio reactive – for example the things in my visuals that I have made audio reactive are:
– intensity of glow on a composition
– x and y positions of an emitter
– fractal displacement of a sphere
– amplitude and offset of geometry
– fractal displacement of a particle field
but there are many more possibilities that I would like to explore over time.

Limitations and overcoming them

Throughout the journey of this project so far I have come across many limitations that have halted the flow of my work, but I have always been able to overcome them, meaning I learnt a lot more than if everything were to run smoothly.

The main limitation I came across was the room that I have been given access to for building and rehearsing – I did not think that the the room would be big enough for me to evenly spread the projectors around the cylinder, therefore meaning I might not be able to get a completely 360° visual. However, after a lot of moving around and tweaking, I was able to get a nearly even spread around the cylinder, meaning I could get a 360° visual displaying on the surface.

Another very large factor that has affected my work flow, is that I only have access to this room between the hours of 5-8pm, which is after all technical support have gone home. This was an issue for me because I wanted to work over a weekend, however I had a technical issue in which I had no network connection, and therefore could not work on rehearsing my project over that weekend because I could not get technical help. I overcame this issue by re-evaluating my to-do list and re-arranging the time that I had planned, so instead of rehearsing that weekend, I spent the time progressing with my visual designs.

Another major limitation I had, was that I was using a corded mouse and therefore could not see around the other side of the cylinder for setting up the displays. My friend then told me about Team Viewer which allows for one display to be linked with another device wirelessly ie. a phone, tablet or a laptop. So we set up Team Viewer on my friends phone to essentially use that as a mouse for setting up the displays, and then transferred this onto my laptop for controlling the videos once the displays were set up. (Laptop shown in image above and phone controller shown in image below)

Although I have had many limitations along the way, I have managed to find solutions to all problems and to overcome these limitations to be able to produce a finished product.


Hardware and cabling

After figuring out that the simplest way for me to use 4 projectors was to use a PC that supported 4 outputs, my tutor (Liam Birtles) got in touch with IT at the university to ask whether they had a PC that would meet my requirements. They kindly said that they would build a PC for me with a 4 output video card. The PC has an NVIDIA Quadro M4000 graphics card inside, which has 4 Displayport outputs:

The projectors that I am lending out are all HDMI input, therefore I needed to get the right cables for the project – either HDMI-Displayport cables, or straight HDMI leads with a HDMI-Displayport adapter. Due to the sheer size of the project, I also needed to get cables that are long enough to stretch from the PC to the far side of the cylinder – approx 8-10㎡. These are the leads I ended up using:

1x 1.5m Displayport-HDMI cable
1x 5m HDMI cable with Displayport-HDMI adapter
2x 10m HDMI cable with Displayport-HDMI adapter

IT have also given me a transmitter, in case I need to go further than 10m.

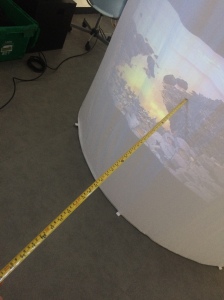
The circumference of the cylinder is approx 6.3m, therefore each of the 4 projectors needs to project a throw of approx 1.6m wide. When rehearsing, I measured that to get a 1m wide throw on the surface, the projector needs to be approx 1.50m away, therefore, I need my projectors have around 3m throw distance to project the size I need.

Because I want the audio to be listened via headphones, I ordered wireless/bluetooth headphones. I did not realise that most PC’s do not have bluetooth capabilities, so I then had to purchase a USB Bluetooth dongle to be able to use the headphones.

New cylinder structure – 2nd Iteration

After the construction of the cylinder did not go as planned last time, I said that I would try out using solid metal bars instead of fibreglass rods, as these will be more sturdy and will not warp when put under any pressure. With the help of my mum, we were able to connect 3 bars together using bolts and screws because we could not find a single bar long enough (6.3m) –

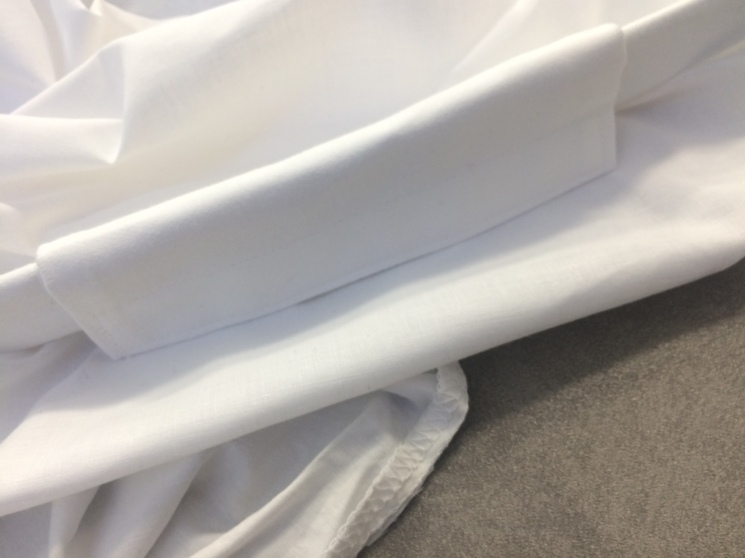
My mum also created an extra piece of fabric to fold over the bar to hide this connection.

We then attached roman blind chord with toggles at points around the cylinder, with the chord tied to a clip in the middle (like last time)

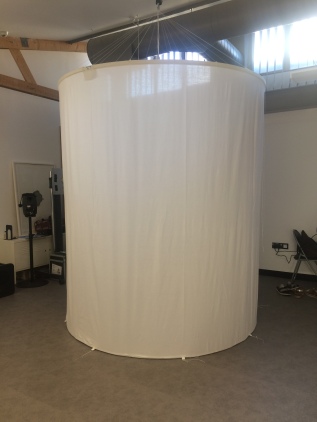
This allowed for us to evenly erect the shape by making the toggles tighter until we eventually had a taut cylinder that is ready to have visuals projected onto.

Reflections All Around

The theme of reflections has been at the forefront of my project, from completing artists research to including it in my visuals as the predominant subject, I started to notice more and more reflections in my every day life that caught my attention.

The video below is a compilation of various videos that I have captured, that use reflection and refraction to create wonderful patterns, colours and glows. This style is reflected within my work, as I have taken inspiration from the colours and patterns that occur.