Audiences

My project will be exhibited as part of the Graduate Show for the entire course. For this, it means it will gather a specific demographic of audience; audiences that would be likely to attend and engage in an exhibition.
Exhibitions and galleries generally attract similar types of audiences; Arts Council England have devised an Arts audiences: insight (2011) report, in which they review audiences engagement in art. From the report it shows that there are three types of people who like to visit exhibitions: the highly engaged ‘Urban Arts Electic’, the ‘Fun, Fashion and Friends’ type and the ‘Mature Explorers’ who both only have some engagement in arts; each of these have specific demographics. What I find interesting however, is that out of the thirteen categories the Arts Council found, only three of them would be likely to attend an exhibition. The general demographics of these exhibition-attending type, are that they are likely to be well educated, they will be on average or above average pay in full time work (or still in higher education), they have a mixed gender, and they are mostly white.

Although I find it interesting to look at the demographics of certain audiences, my project does not have a specific intended target audience as it can be used by people of all ages and people with varying interests, thus, the audience of my project will be anyone who attends the exhibition. From attending the previous exhibition the general audience is fellow students, staff members, friends & family, and any prospective employers. However, if after the exhibition my project is displayed elsewhere, the general audience could change yet again, therefore I do not have an specific target audience for my project.

pexels-photo-131222

References:
Arts Council England., 2011. Arts audiences: insight [online]. Arts Council England.
Click to access arts_audience_insight_2011.pdf

Music Visualisation Techniques

As well as the visuals I created previously, I have continued to explore the Trapcode suite and I have created a further four audio-reacting visuals using Trapcode Particular or Trapcode Form.

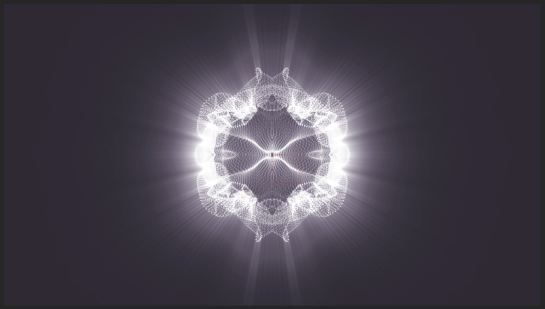
This video was made using Trapcode Form, I used the audio-react function of the plugin to link the music (Muzzy – Junction Seven) to the visuals. The effect in the middle was created using the spherical field layer, where I adjusted the strength to ‘stick out’ of the base form. When the new beat comes in, I then created a new camera layer and adjusted where the camera was pointing, to get a different angle on the form.

This is one of the second visuals I have been working with, it was based on a Northern Lights preset using Trapcode Particular, which I have edited to make it more abstract. The movement is randomly generated, and the glow is the one element that is connected to the music. I feel that this kind of visual would work best with a slower genre of music, so that the flowing movements of the visuals connect with slower/longer notes and chords in a song.

This is the third visual I have created, it is a simple spherical particle field, which reacts to the audio by dispersing the particles predominantly from the top of the sphere. This is the very basic form that I have created but it has the scope to be a lot more flexible and create really interesting visuals.

screen-shot-2016-12-03-at-14-15-09

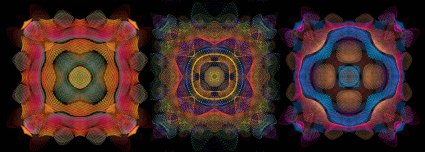
After uploading this video I even discovered the ‘Kaleidospace’ element of the Trapcode Form plugin, whereby you can put a mirroring effect onto the composition.

I then watched some further tutorials about the Trapcode Form plugin, and I was able to make this visual which looks like a distorting floorboard. I really like this idea as it can be the basis for many different music genres, as this can be at the bottom of the projection and I can create a main visual to be ‘floating’ in the middle. Using the camera on After Effects and the depth of field setting can drastically change how a composition looks – I think it works very well in this situation as I can imagine to someone watching in Virtual Reality it would look 3D.

I will continue to experiment with different forms of visuals to create different effects, because if I have time, I would like to be able to create a number of different visuals to match different genres of music.

Escapism in the Digital Age

Escapism is a way of avoiding an unpleasant or boring life, especially by thinking, reading etc. about more exciting but impossible activities.” (http://dictionary.cambridge.org/dictionary/english/escapism)
Although I agree with this definition, I feel that in the digital age, this definition has gone a lot further than just merely avoiding reality. I feel it is more about making time from everyday reality, to situate oneself in somewhere other than their current reality, such as watching a fiction TV show or playing a video game. As fashion designer Iris van Herpen explains, “escapism is about the addiction of constantly escaping reality by digital entertainment”. I almost completely agree with this statement, however I do not agree that it is an addiction – most explanations of escapism state it as a “cause to ‘leave’ the reality in which they live” (Vorderer, 1996, p. 311), therefore meaning that it is not all the time, and only if something is triggered. Escapism can be perceived and explored differently by each individual, and some may not even think that they are escaping anything by exploring digital entertainment, so no ‘general’ statements can be made about it. However, I hope that the audience of my project could accept it as a means of escapism – the idea that they will be completely immersed in the music and audio-reacting visuals, it will automatically be taking them away from the other realities that surround them.

Click to access IVH-Escapism.pdf

http://citeseerx.ist.psu.edu/viewdoc/download?doi=10.1.1.581.6337&rep=rep1&type=pdf

Curved Surface Projection – My Attempts

After looking into the likelihood of me being able to borrow an Oculus Rift or HTC Vive for the duration of the project, I have decided to proceed with the Cylindrical projection Immersion idea instead. Although I would have really enjoyed learning a new plugin to create VR, it is not going to be practical. I also prefer the projection idea as I like working on tactile objects rather than a virtual space.

To experiment with projecting onto a curved surface, I practiced using a bin. For this, I used the visuals I have already produced and put the video into MadMapper. In MadMapped I resized and reshaped the video to how it would best look projected.

As you can see, the video only covers part of the bin’s curved surface, if I were to make the video any larger, the image would have seeped onto the wall rather than wrapping around the bin. This shows that for a full 360˚ projection around this object, I would need at least 4 projectors to project onto each ‘side’.

img_2802

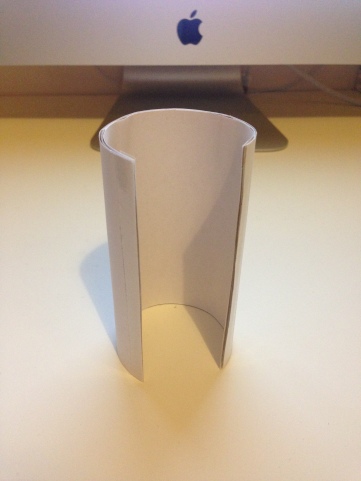
I also made a small-scale prototype of the cylinder (above) to demonstrate how I imagine the space to look. Even though I am not projecting anything onto the cylinder, the light from my room shows that I will not be able to project from outside of the cylinder at all due to shadows appearing inside. Furthermore, this proves that I will have to use multiple projectors from inside the space, to avoid lighting issues and to make sure the entire surface of the space is covered with the image.

Curved Surface Projection

The company Projection Artworks recreated a large-scale version of the famous Faberge eggs for a Harrods window display, using a model and projection mapping. They used 16 projectors and stitched the images together to cover the entire surface of the sculpture. Their task was particularly tricky as they wanted the projection to be viewable in daylight, meaning the brightness of the image had to be a lot greater than it would have been in darkness.
http://www.projectionartworks.com/work/faberge

In relation to my project, this shows the amount of projectors that are needed to project onto a round surface, so although I’m sure I wont need 16, I am going to need at least 3/4 to cover the surface area of an almost 360˚ cylinder. My next stage will be to look further into cylindrical projection, and the technicalities of what I will need for the projection to work.

Analema Group – KIMA

After recently attending a workshop with Oliver Gingrich from Analema Group (https://analemagroup.wordpress.com), I was really inspired by the work that the group produces and how their work fits into my own project. Drawing on my recent research of Cymatics as well as audio-visualisation, the group have a project called KIMA which stems from research of Cymatics – they describe the works as “Music for your eyes and ears.”

kima-picture
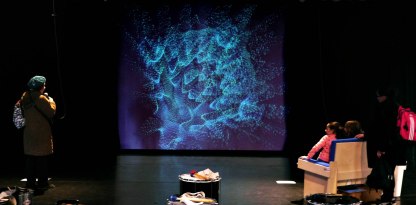
Their installations have been displayed at Incloodu Deaf Arts festival, whereby the audience can feel the vibrations of sound through the bench they sit on, and they can see the cymatic visuals displayed via projection.

kima-installation-incloodu1-copy

I can see many similarities in the work Analema Group produce, and the ideas I have for my final project. KIMA focuses on sounds and how they are represented in a visual format, as well as a lot of their installations being interactive, therefore I will be taking inspiration from Analema for my work as I can see how their work has evolved over time with the feedback they have from events, and the use of new technologies.

Prioritising and Organisational Techniques

Qiao Ma (2009) explains that prioritising is based on the requirements needed in a project, but most of the time projects do not have unlimited resources, so “stakeholders need to decide which requirements should be implemented. Requirements prioritisation helps the project developers to select the final candidate requirements within resource constraints”. Therefore, for my project I am implementing the MoSCoW method to prioritise the requirements that are a necessity to the outcome, over the requirements that are not necessary. From this, I have then created a Gantt Chart to organise my time throughout the project, which not only prioritises requirements but also has a logical structure to make sure everything is done in the time.

MoSCoW Method:

The MOSCOW method is a prioritisation technique, used to display in a project what it MUST have, SHOULD have, COULD have and what it WON’T have. This is used to clearly understand the main elements that the project MUST have to succeed, as well as elements that will help it to succeed but not entirely necessary, and to explain things that the project definitely will not have. It helps a team or individual to “view of what is essential for launch and what is not” (Waters. K, 2009)

For my project, my prioritisation will be as follows:

MUST have:

  • Audience/user immersion
  • Music visualisation
  • Cylindrical projection
  • Music through headphones

SHOULD have:

  • Different music genres
  • Different visuals to suit different genres of music
  • Music edited to play in 360˚ around the listener

COULD have:

  • A way of users choosing their own song/genre
  • Option for complete 360˚ projection, rather than nearly 360˚ – leaving space for user to enter

WON’T have:

  • Space for multiple people – it will be for individual use at this stage
  • A screen interface for music choice

Gantt Chart:

I have created a Gantt Chart to help me organise my time for the project. It is divided into a week-by-week timetable, with various different sections that I will need to work on throughout the project, such as learning software and audio gathering.

screen-shot-2016-11-24-at-10-17-57

As explained in my Iteration Process post, there will be various iterations to my work, which have been taken account for in the gantt chart – I will create a prototype that I will then test and gain feedback on; I will then work on my outcomes from this testing and feedback cycle until I am completely happy with the final project.

References:

Ma, Q. (2010) The Effectiveness of Requirements Prioritization Techniques for a Medium to Large Number of Requirements: A Systematic Literature Review. Dissertation thesis. Auckland University of Technology. Available at: http://aut.researchgateway.ac.nz/bitstream/handle/10292/833/MaQ.pdf?sequence=3 (Accessed: 3 December 2016).

Waters, K. (2009) Prioritization using MoSCoW AllAboutAgile. Available at: https://cs.anu.edu.au/courses/comp3120/local_docs/readings/Prioritization_using_MoSCoW_AllAboutAgile.pdf (Accessed: 30 November 2016).

Iterative Process

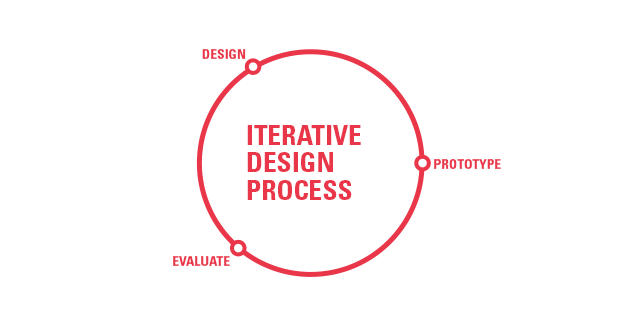
As part of my project, I will be using the iterative process to develop and evolve my designs and visuals. The iterative process is about repeated cycles, every cycle evolving and refining each time. The way each cycle evolves is from testing and evaluating the product/project at the end of a cycle, then the “results of…every cycle are incorporated into the design focus of the next cycle” (Harris, A. 2015).

There are many benefits of using the iterative design process; as Harris (2015) explains;

  • “You are able to make informed decisions backed up by evidence” – the tests and evaluation at the end of each cycle will give plenty of evidence for change/improvement on the next cycle
  • “It saves you time, energy, and money in the long run” – because you are not having to make changes once the product has gone live
  • “It helps you and your team stay creative” – there is a lot of room for experimentation as these can happen near the start of the project, then if something does not work, it can be changed in the next cycle

iterative-design-process

(http://alexdesigns.com/perfect-website-iterative-website-design.html)

References:
Harris, A. (2015) Perfect your Website with Iterative Website design. Available at: http://alexdesigns.com/perfect-website-iterative-website-design.html (Accessed: 23 November 2016).

Cylindrical Projection

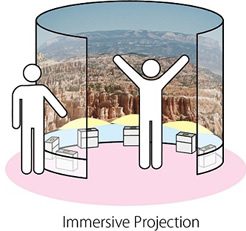
Cylindrical projection is when an image/video is projected into the inside of a large-scale cylinder to give the effect of immersion to the audience/user when they step inside. The image below has been taken from the website of a the tech company Ricoh who have already explored and experimented with cylindrical projection. As they display in their diagram, they use 6 short-throw projectors to be able to project the image. The images simply have to be calibrated together to be aligned with the next projection along.

074_02

(https://www.ricoh.com/technology/tech/074_projection.html)

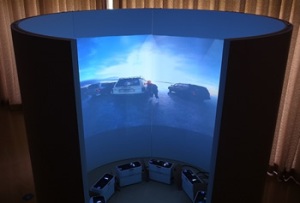
074_05

The second image is how the final projection looks in the space, with the projectors on the floor projecting onto the cylinder, and the space for the audience to stand in the middle. I hope to use this or a similar technique for my final project, therefore my next task will be to test out using projectors on rounded surfaces, and to possibly make a small-scale model to test on.

Mettle – VR from After Effects

Mettle 360/VR is a plugin that can be used for After Effects or for Premiere Pro, to make videos and animations for Virtual Reality headsets or 360˚ videos to go online.  The Skybox plugin means that you can preview in 360˚ as you work, rather than exporting animations then having to stitch various images together. It also connects to the Oculus Rift or HTC Vive so you can preview live as you work.

This video shows how the interface looks when working on it. It seems very user friendly and easy to use, with lots of tutorials on the website to help – http://www.mettle.com/ . Therefore, if I decide that I want to use VR as my route of immersion, then I would like to trial Mettle VR plugin, before I do that I need to get hold of an Oculus Rift or HTC Vive!